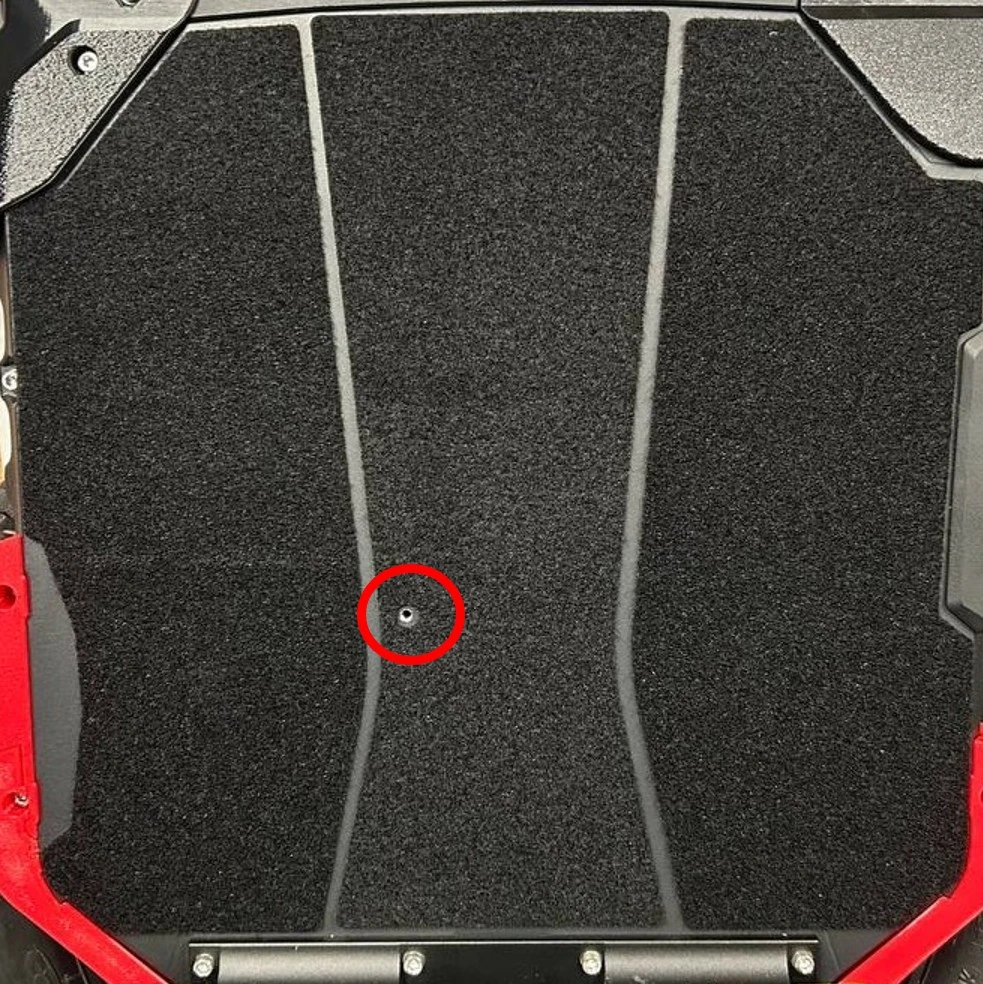
Step 1 - clean the surface of the EUC and apply the velcro. Make sure that the hole in the center part aligns with the screw hole on the EUC.
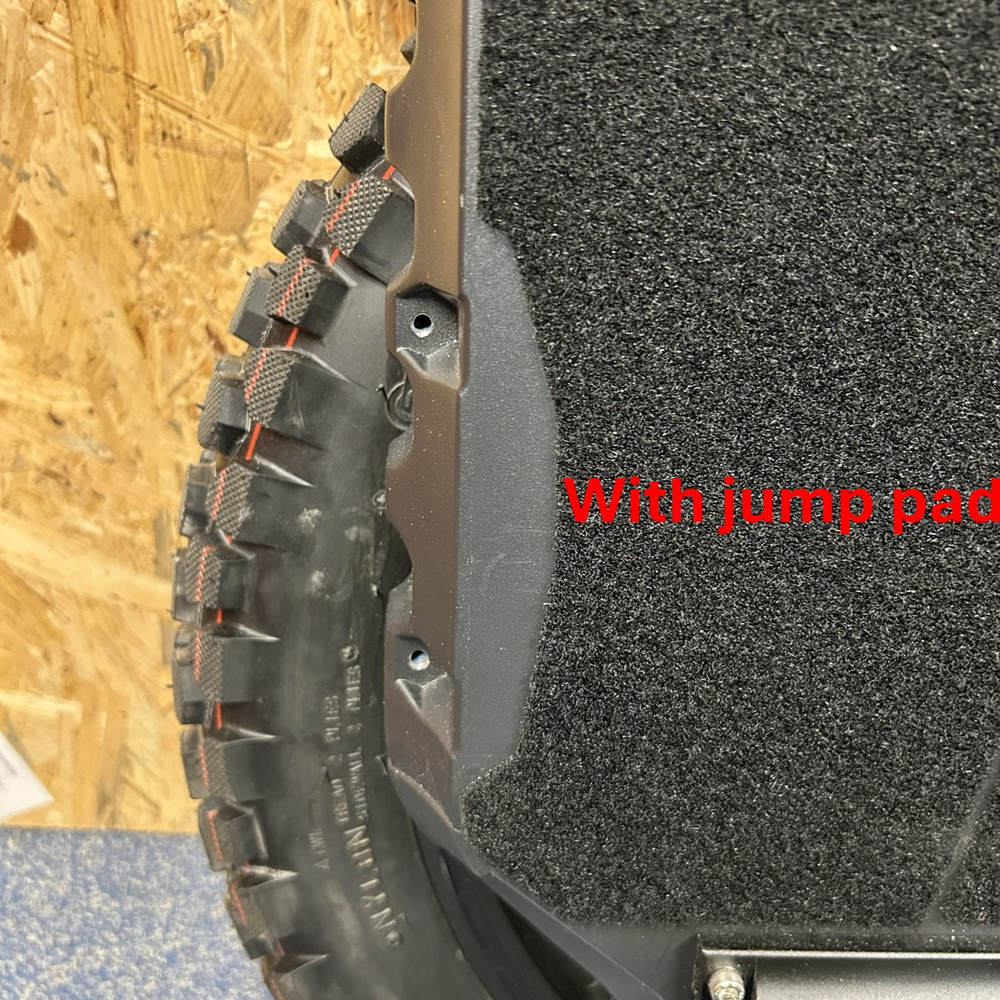
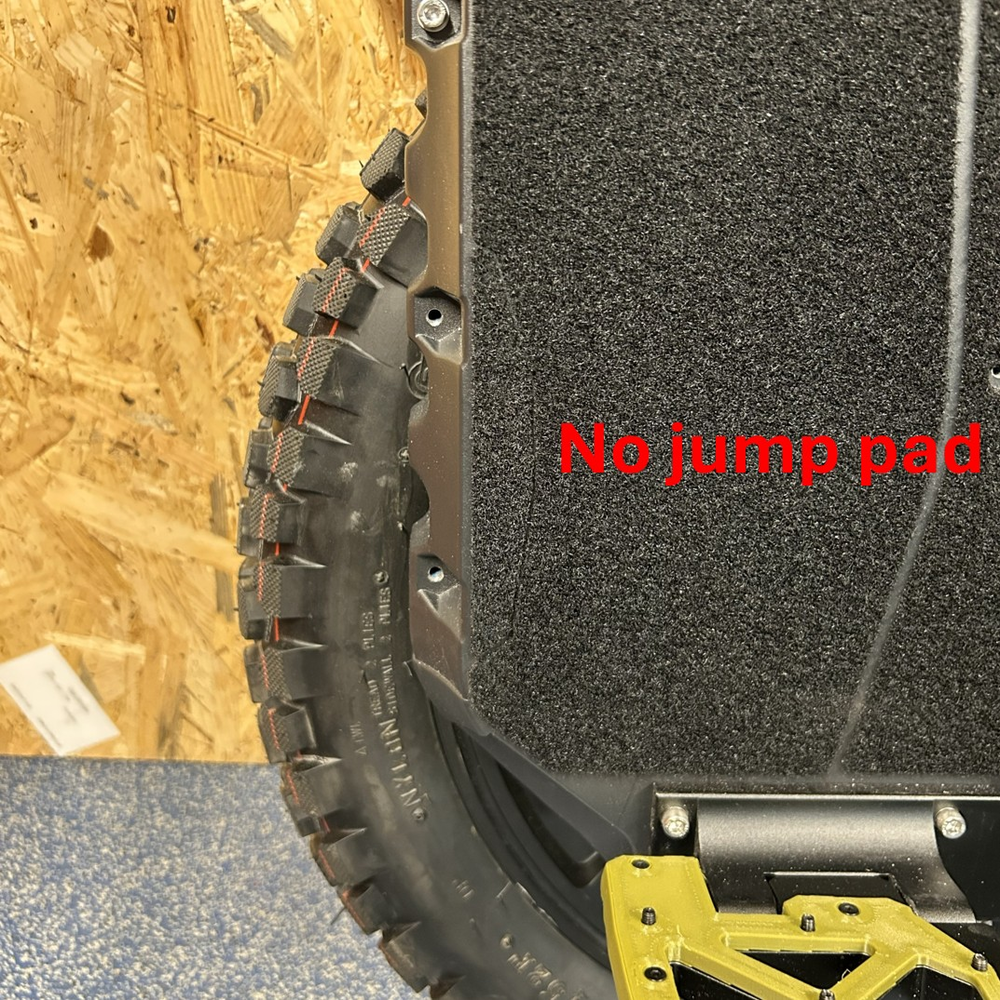
Step 2 - if you are going to keep the jump-pad mount, dont apply the small part on the front. If you remove the JP mount, use this part as well
-
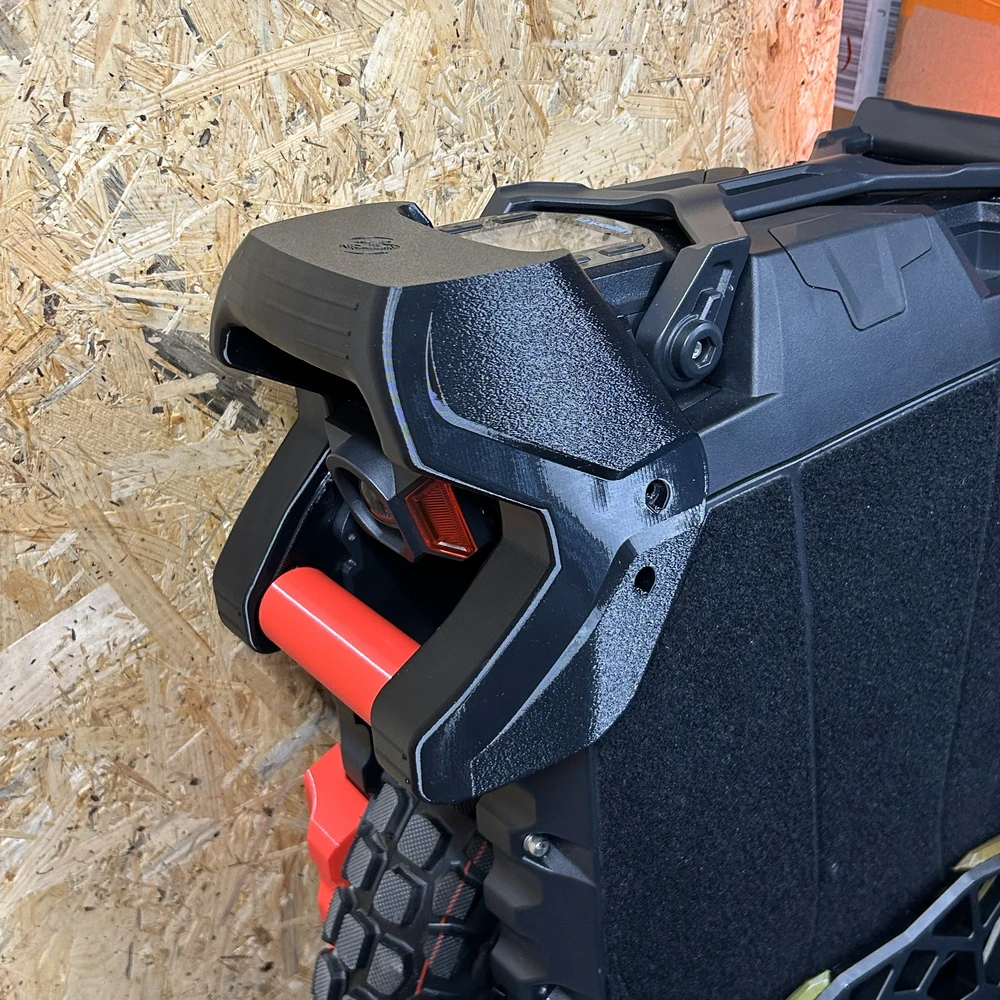
2. Front Bumper
Step 1 - remove the stock front handles. If you purchased the velcro, apply it before you mount the front bumper as part of the velcro goes under the bumper
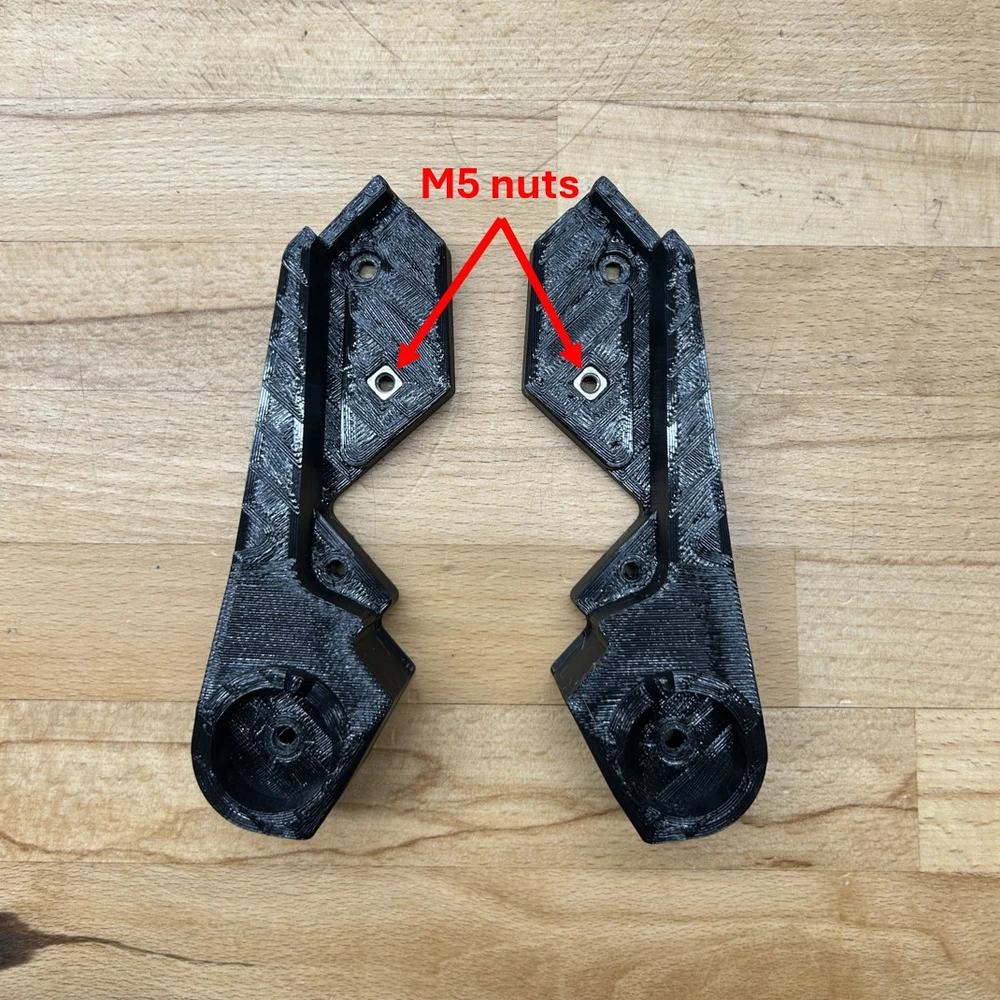
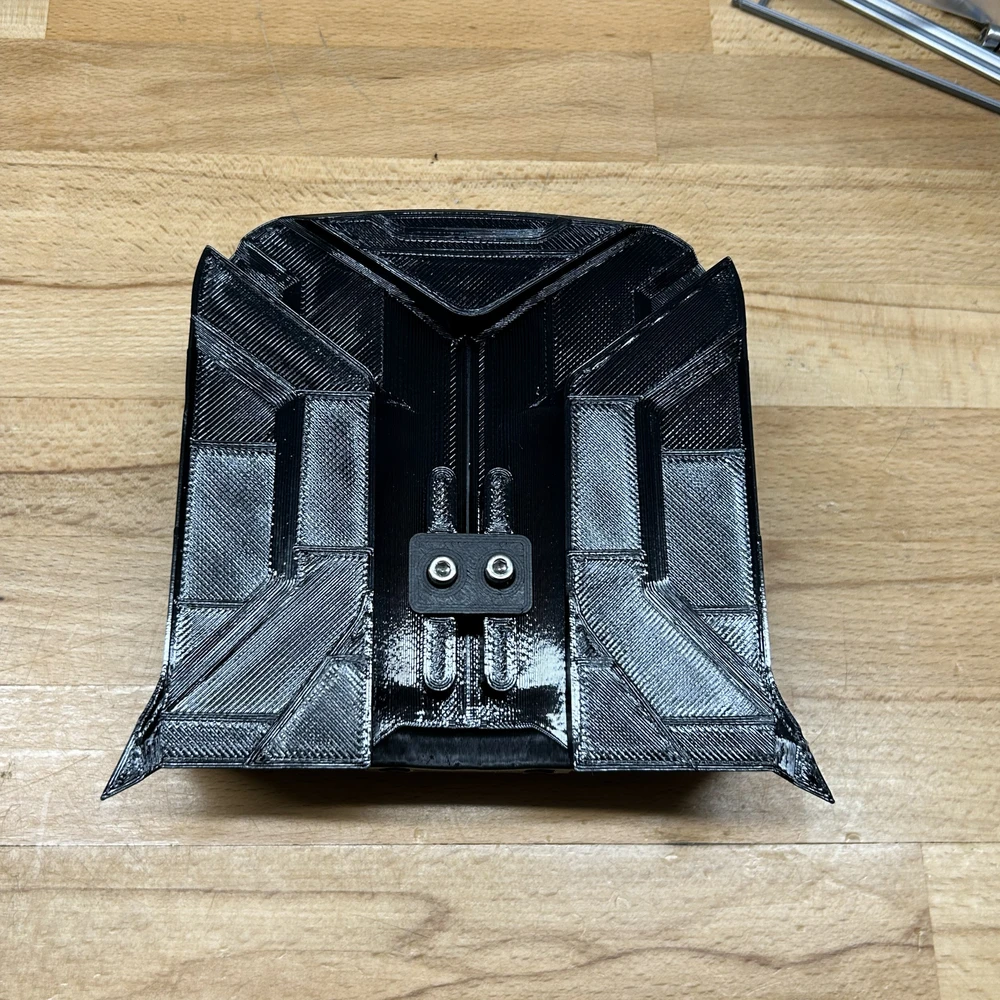
Step 2 - insert the M5 and M4 square nuts in the slots of front bumper mounts
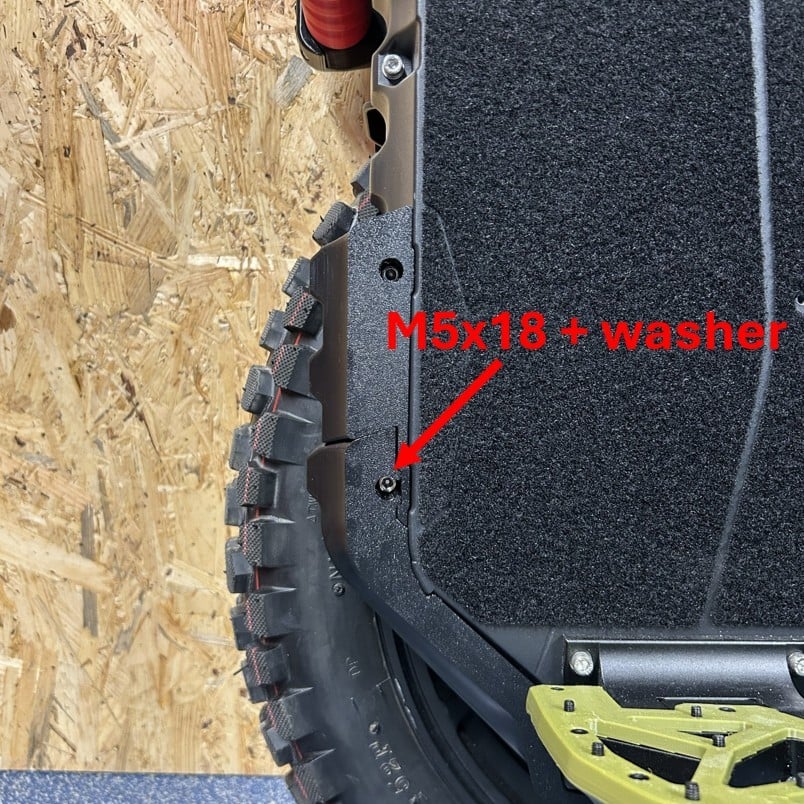
Step 3 - install the front bumper mount on one side using the provided M5x18 screw with washer
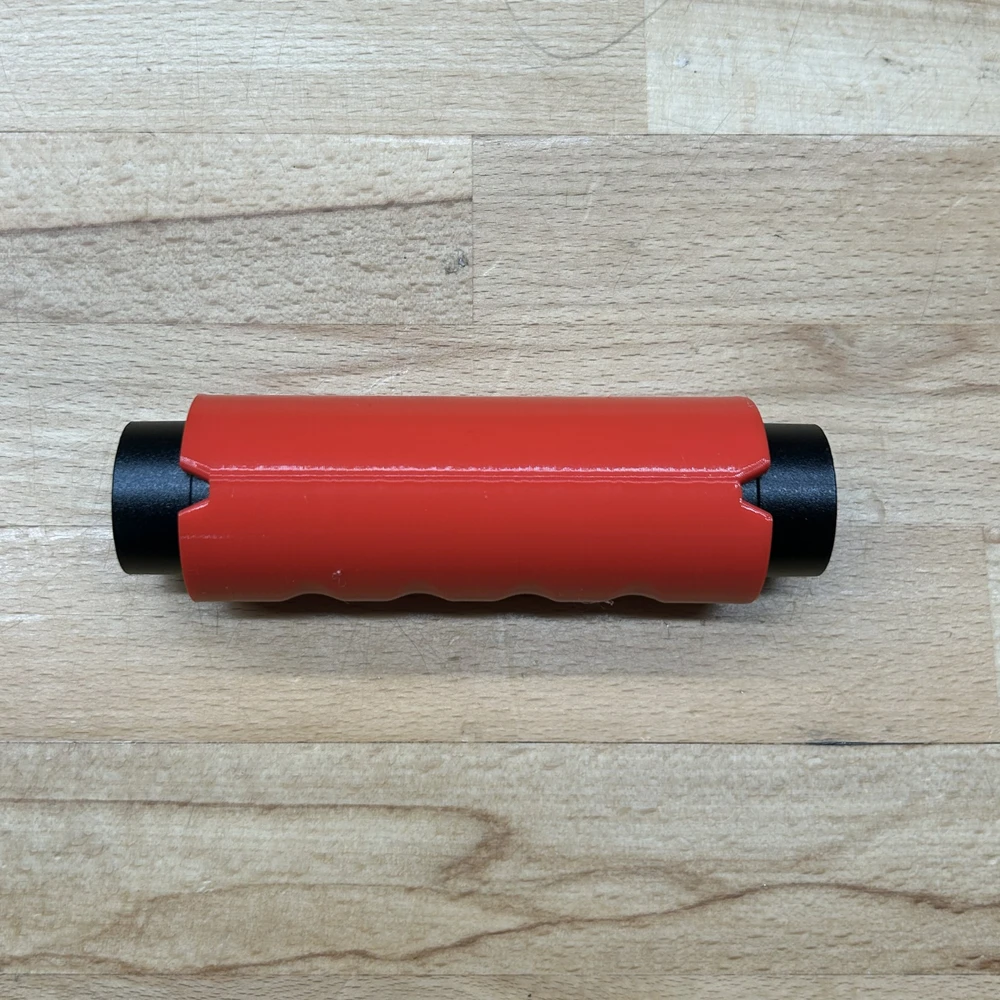
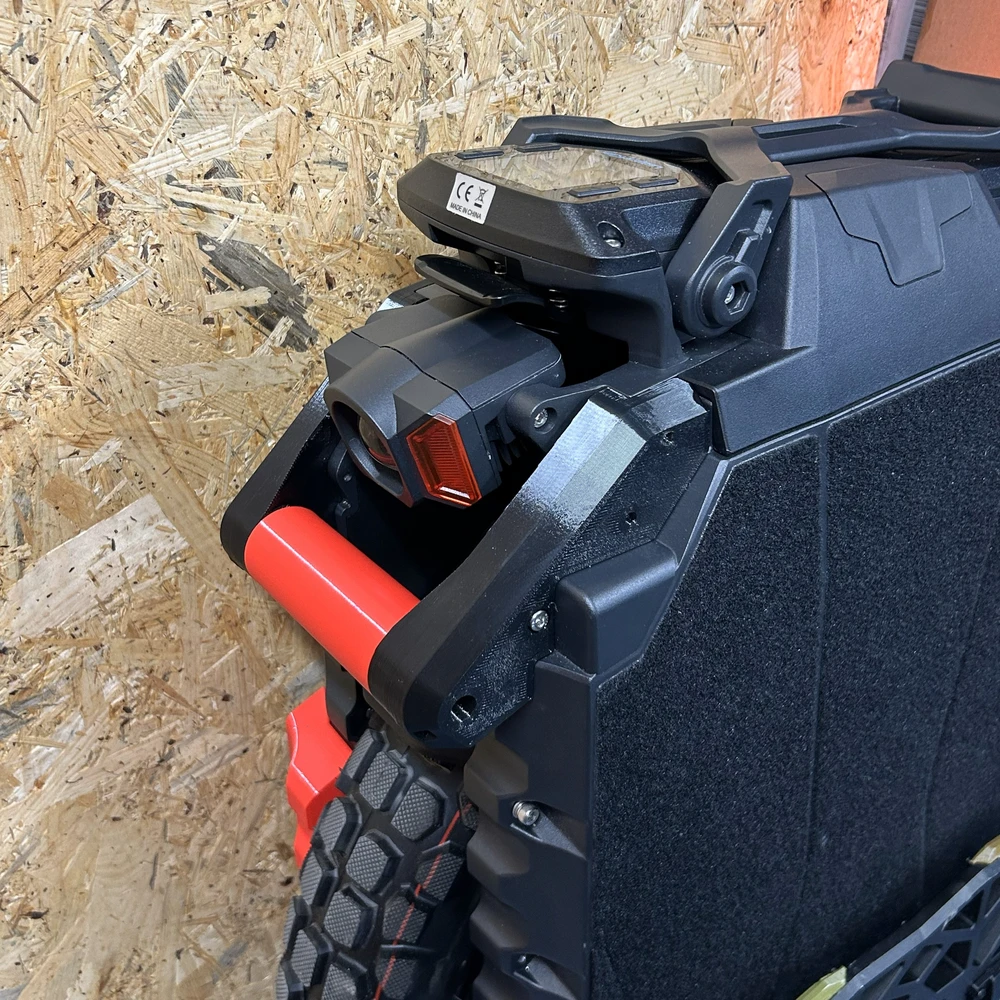
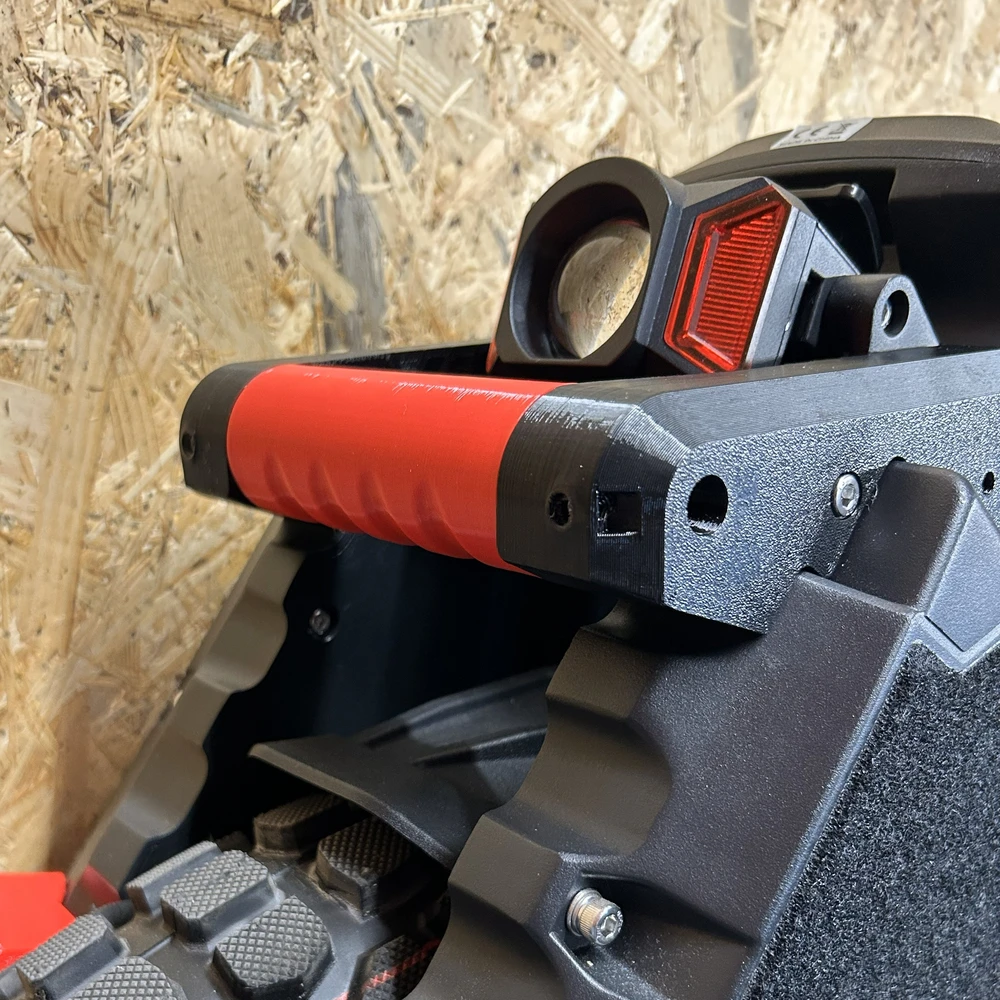
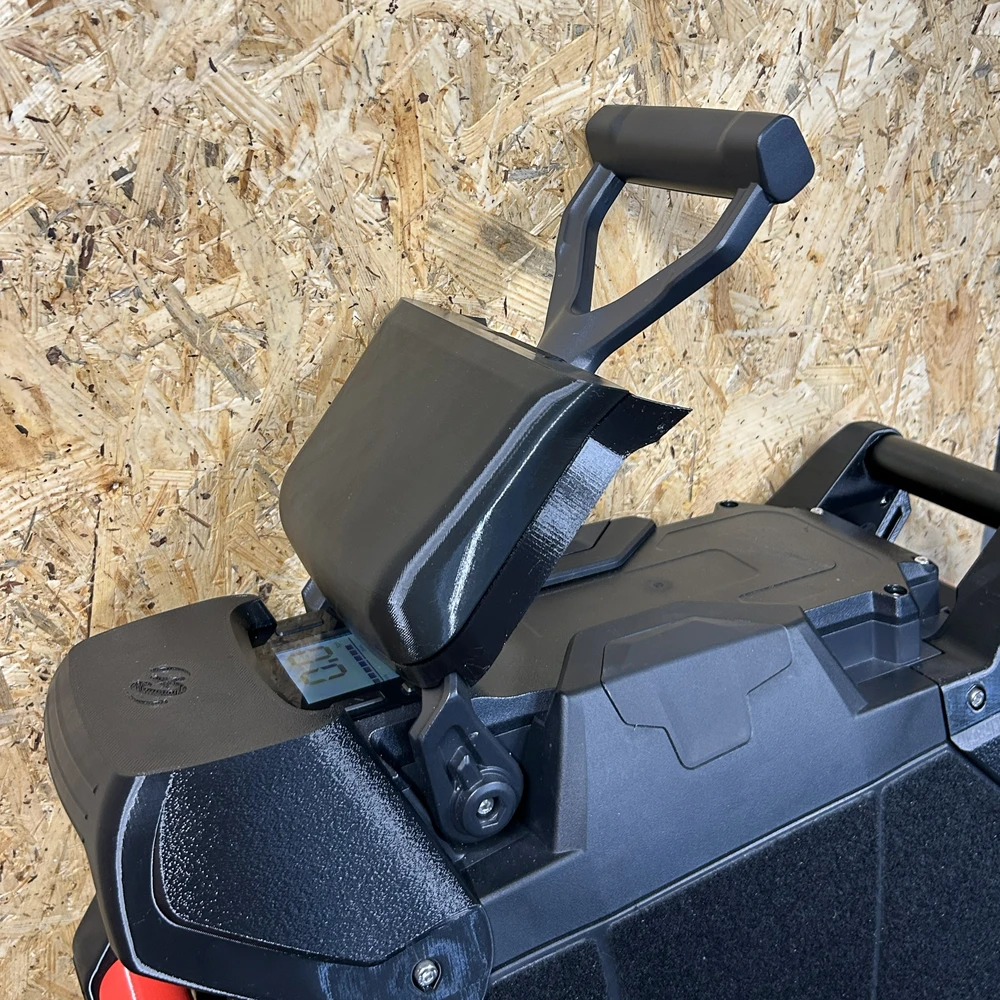
Step 4 - slide the grip on the handlebar, align it with the second mount and install it on the EUC. Use the stock black screws to secure the handlebar. Make sure that the finger cutouts point to the ground
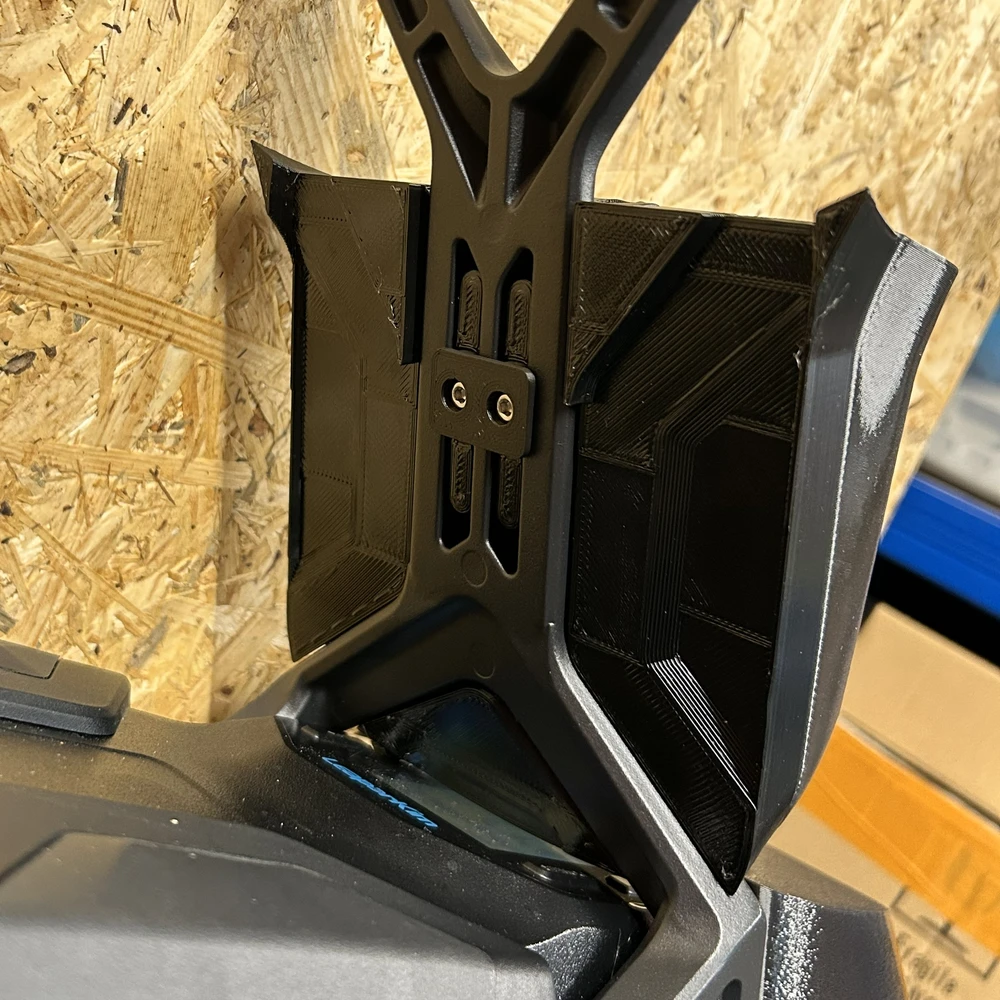
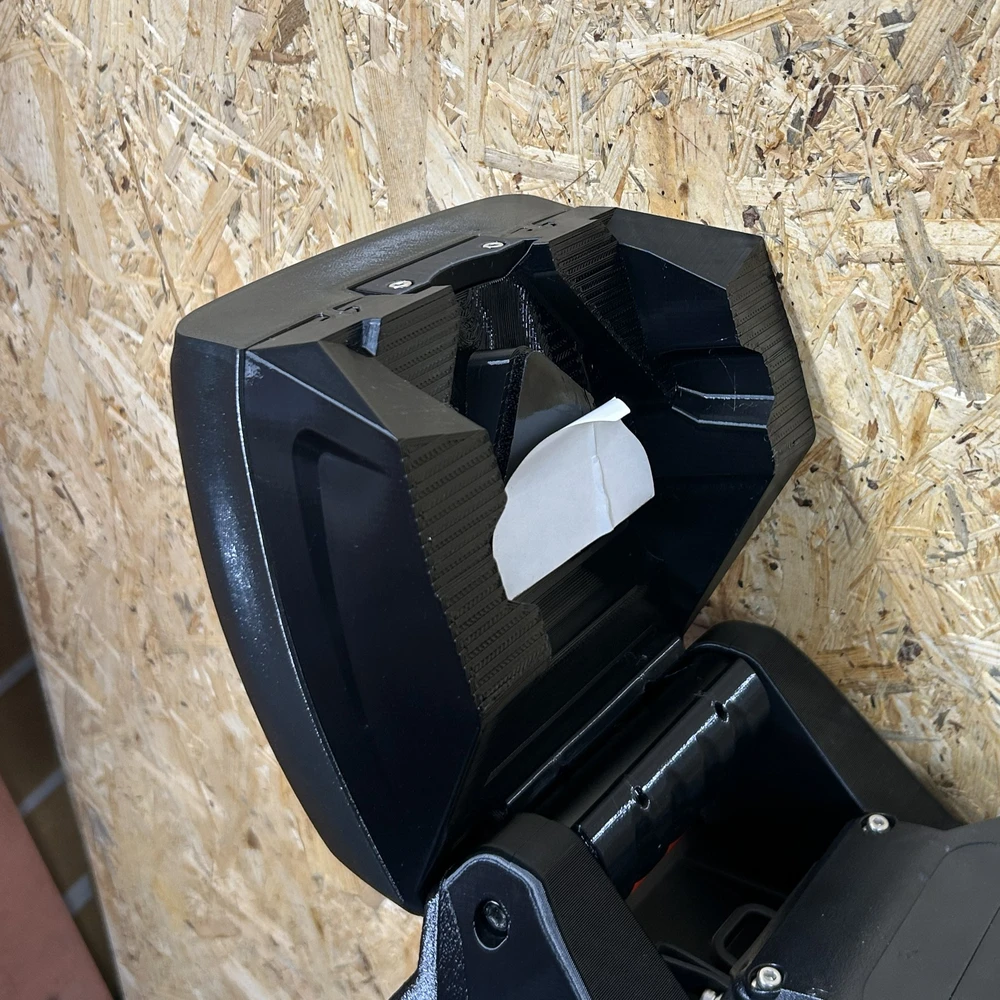
Step 5 - put the front bumper in place, secure it in place using 2 M5x18 screws with washers on each side
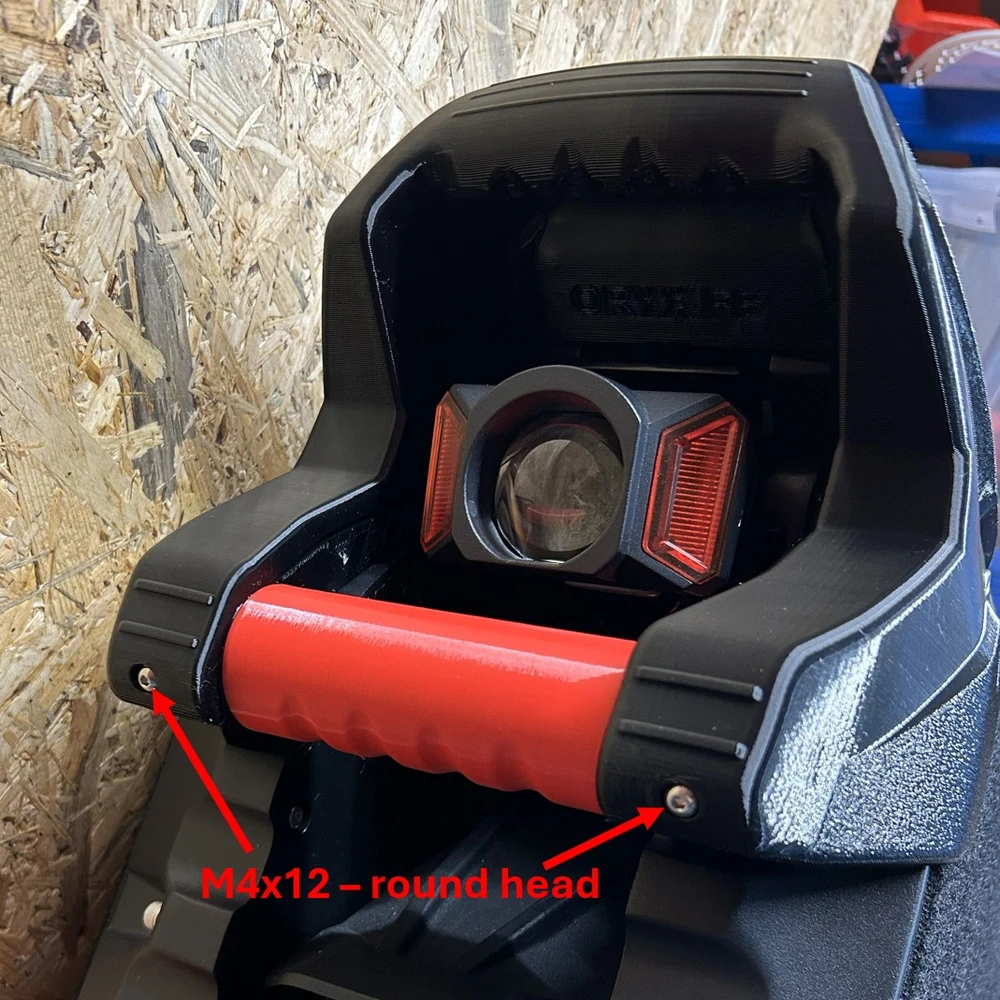
Step 6 - screw in the round-head M4x12 screws on the front part of the bumper
-
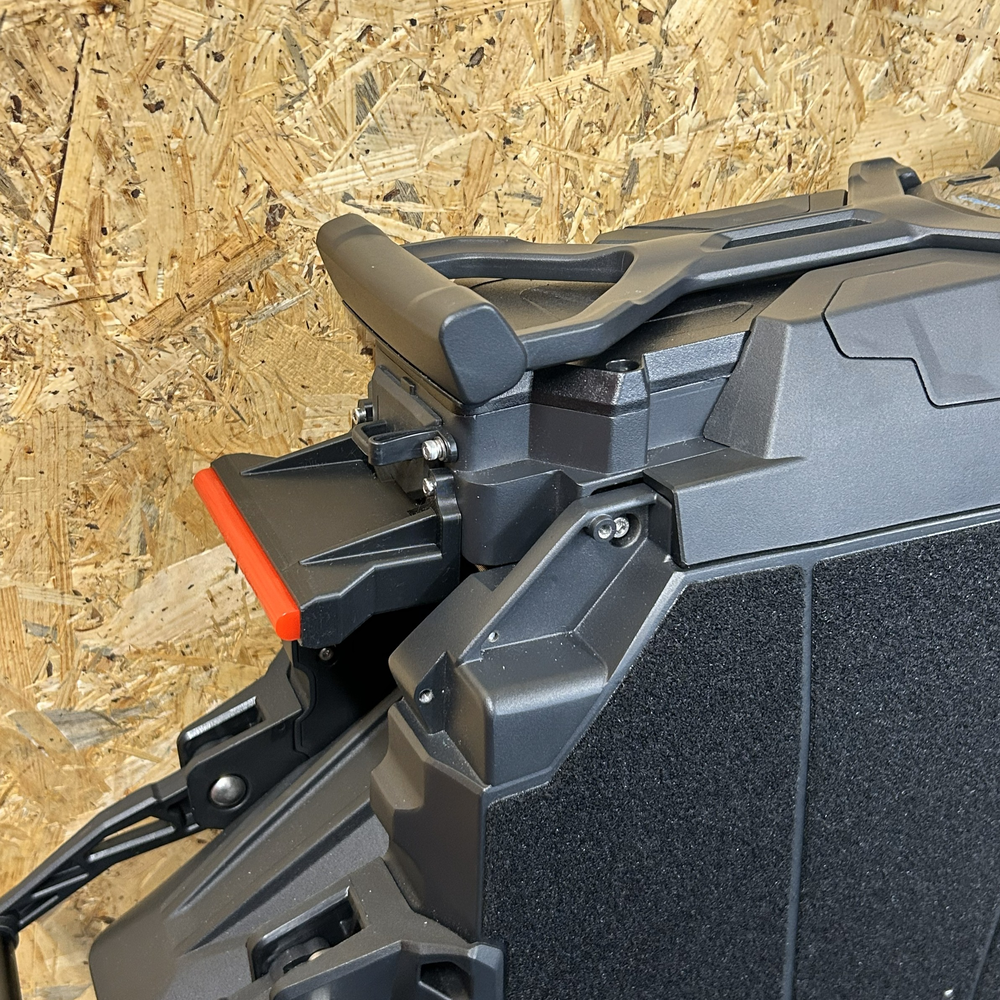
3. Rear handles
Step 1 - remove the stock rear handles
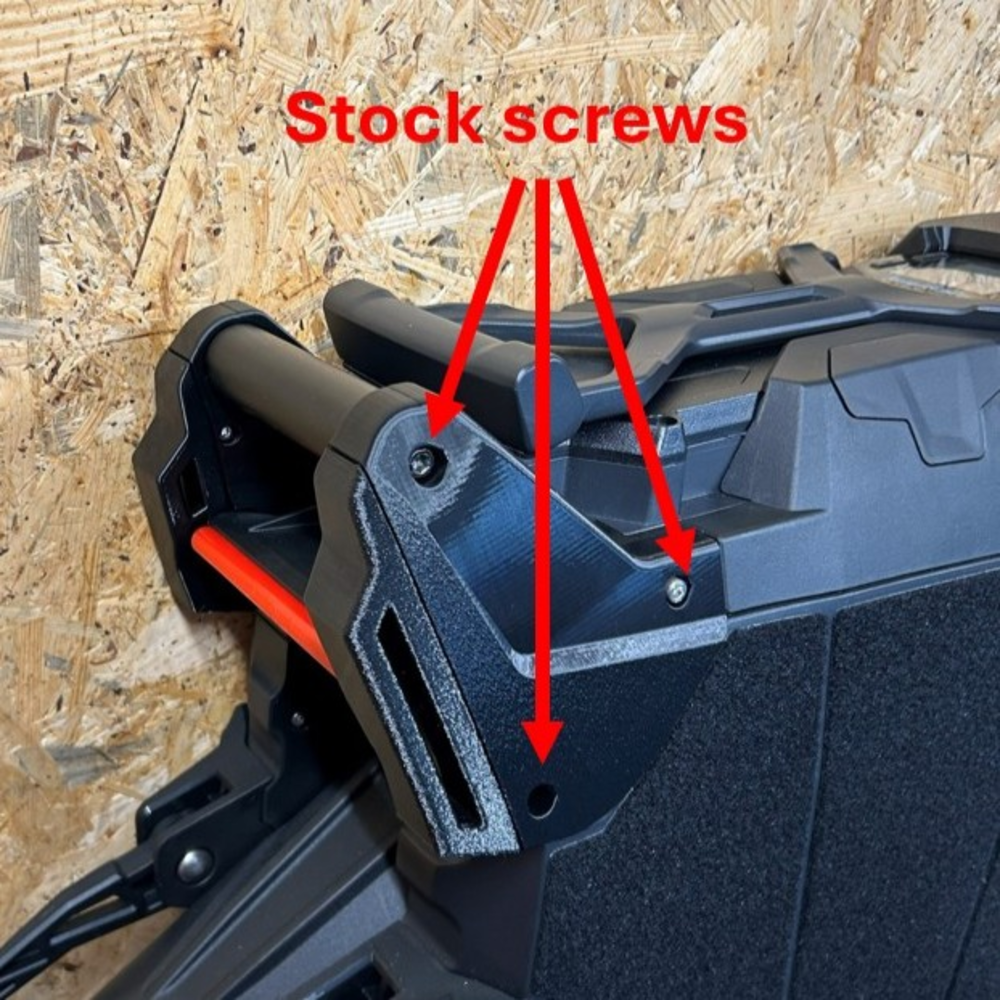
Step 2 - install the handle on one side using the stock screws
Step 3 - install the handle on the other side with the handlebar inbetween. Both the handle and the bar are installed using stock screws
-
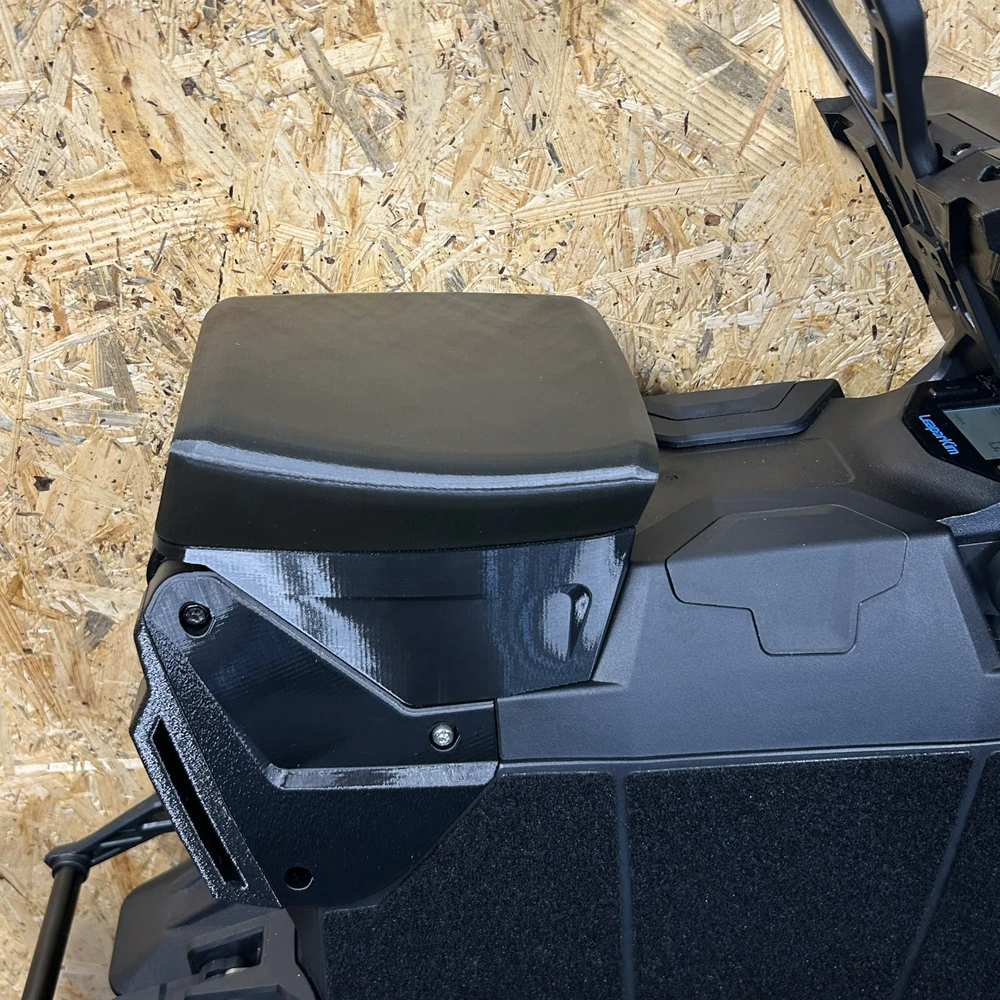
4. Seat
Step 1 - remove the screws and a bracket from the bottom of the smaller part of the seat
Step 2 - snap it in place on the front of the trolley handle. Install the bracket and screws on the bottom of the seat
Step 3 - Install the larger part of the seat on the rear handlebar
Step 4 - peel off the protective paper from the velcro on the bottom of the seat. Close the seat and press it down. Now open the seat and push the velocro down with your fingers so it adheres to the EUC properly
-
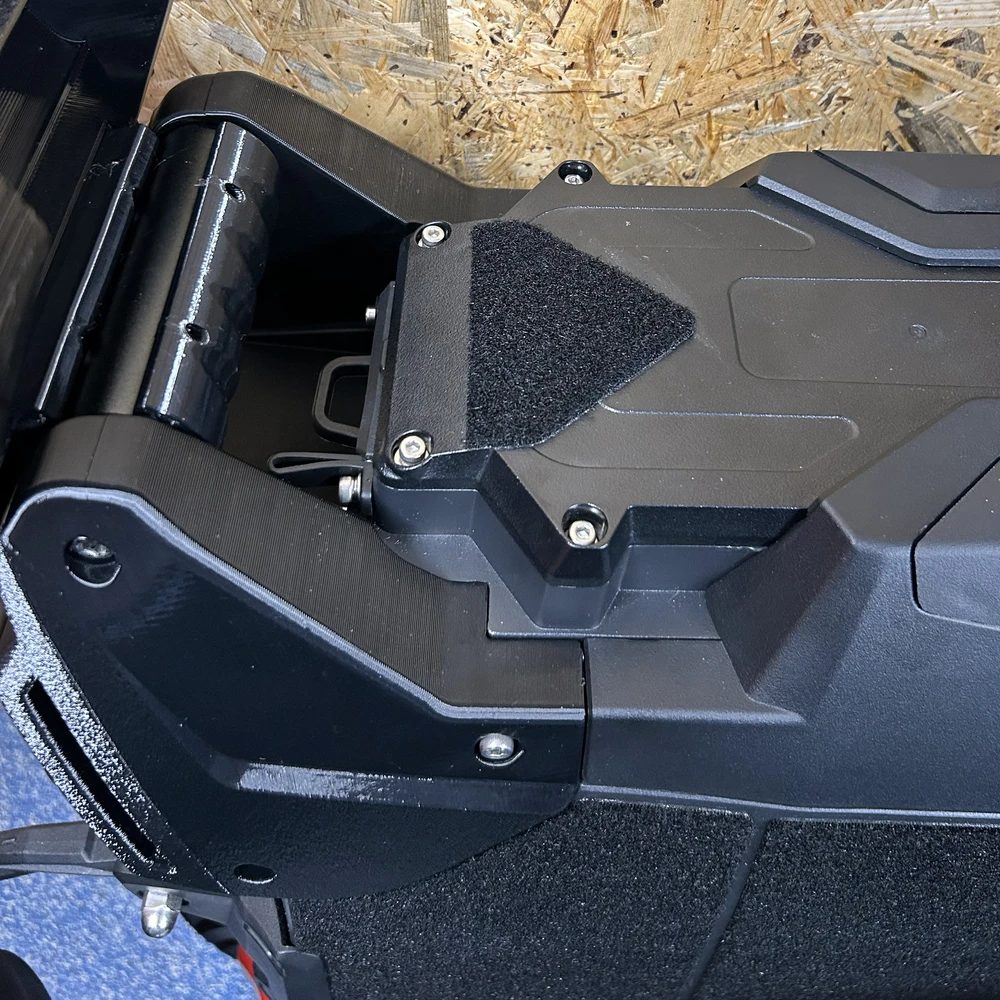
5. Bottom protection
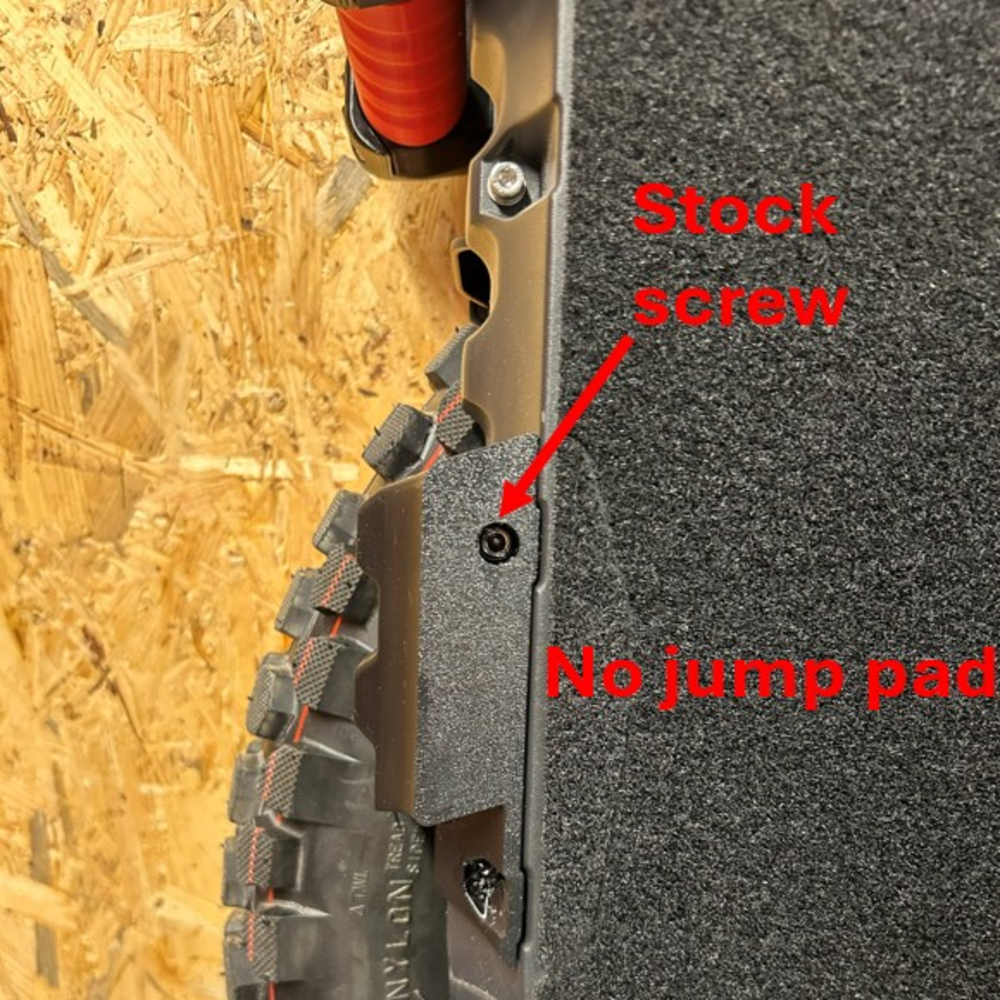
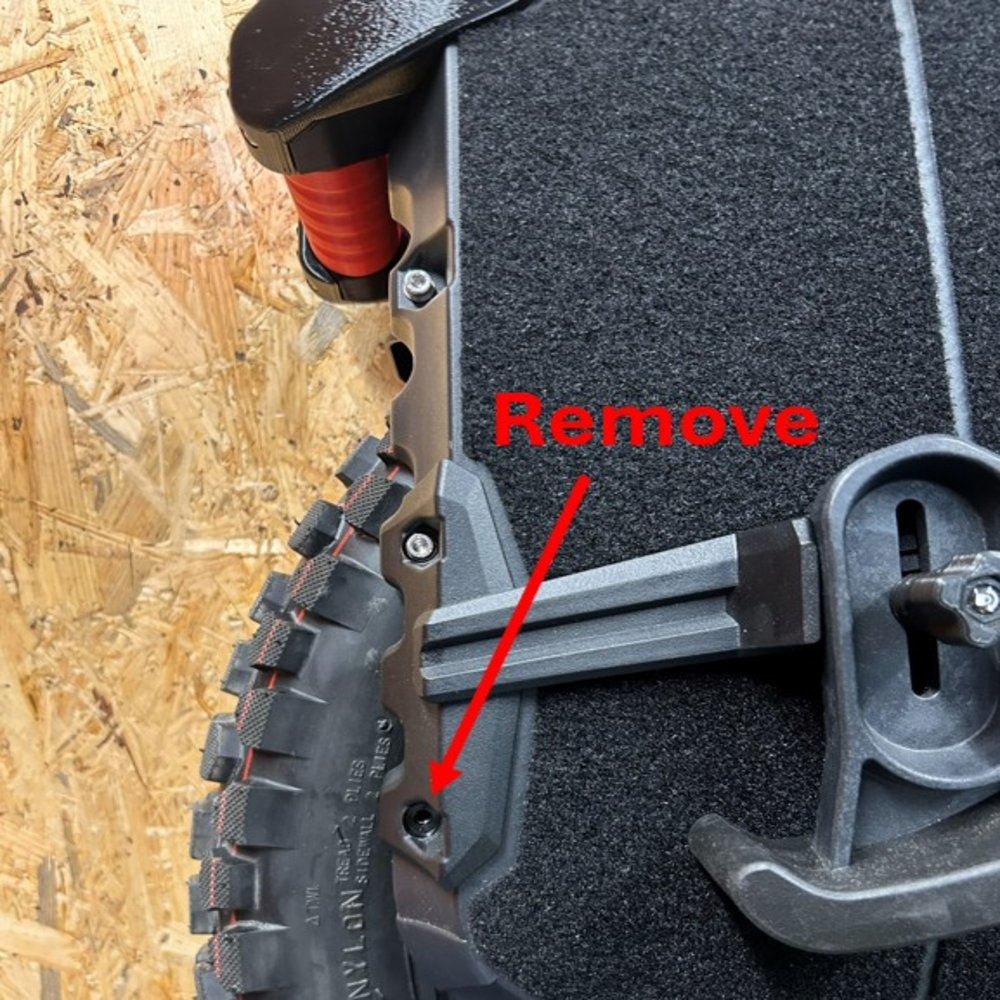
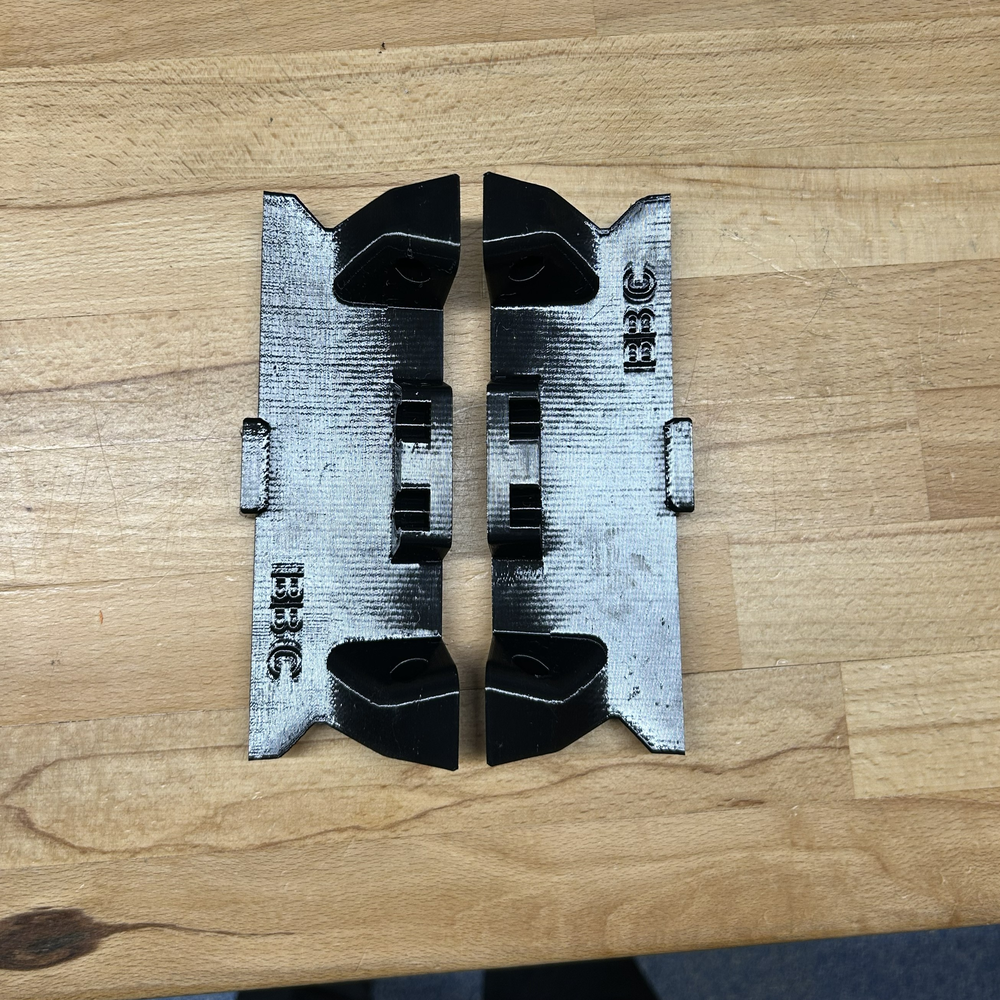
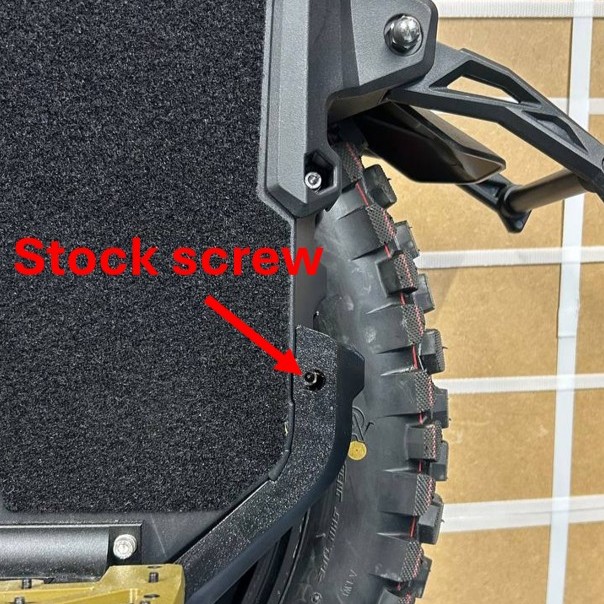
Step 1 - if you purchased the "No jump pad configuration", remove the JP mount and install parts BB A1 (left) and BB A2 (right) using 1 stock screw on each side. If you want to keep the JP, remove only one front bottom screw like in the photo
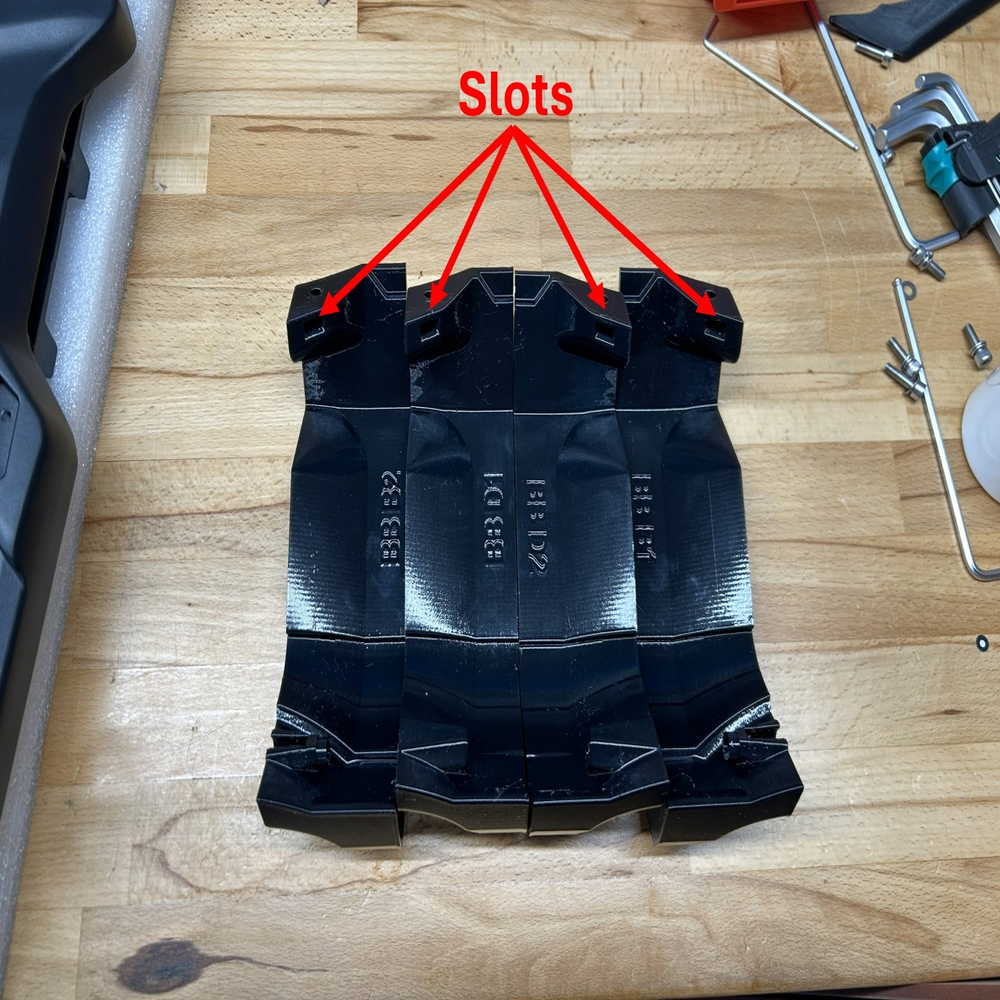
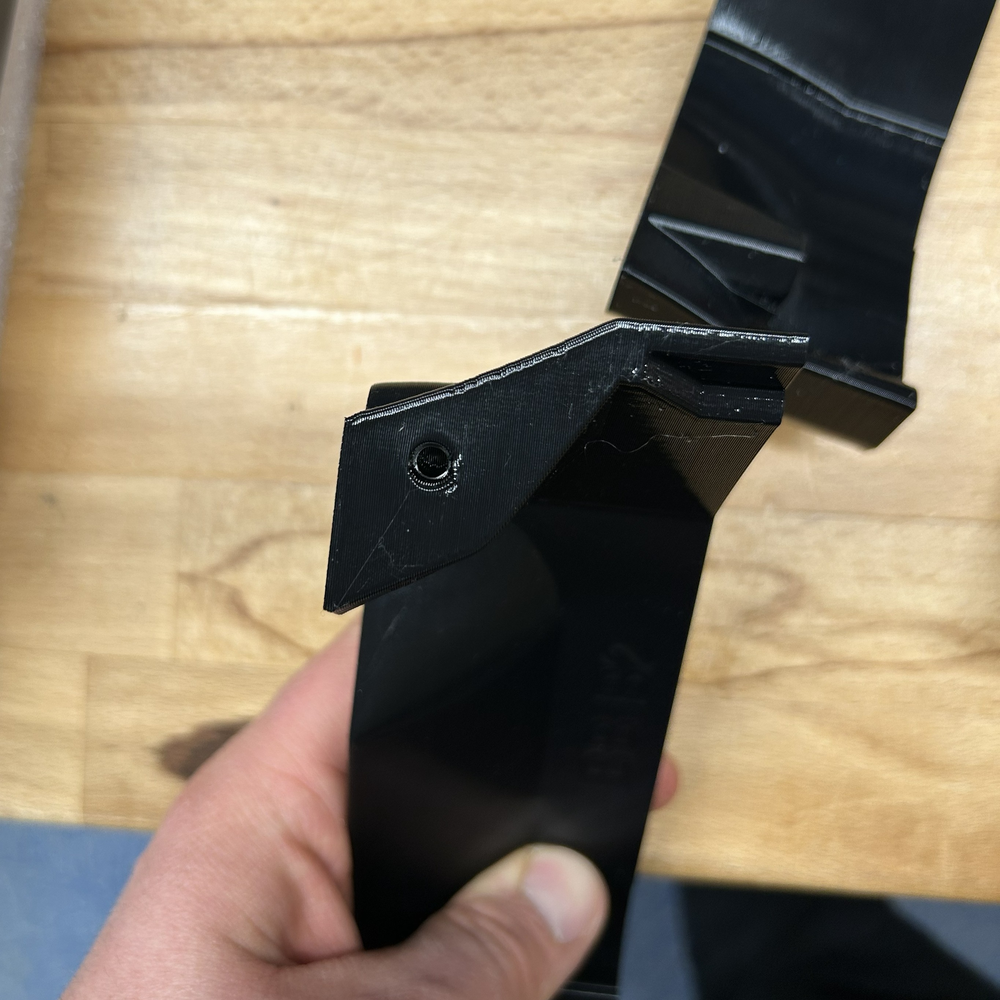
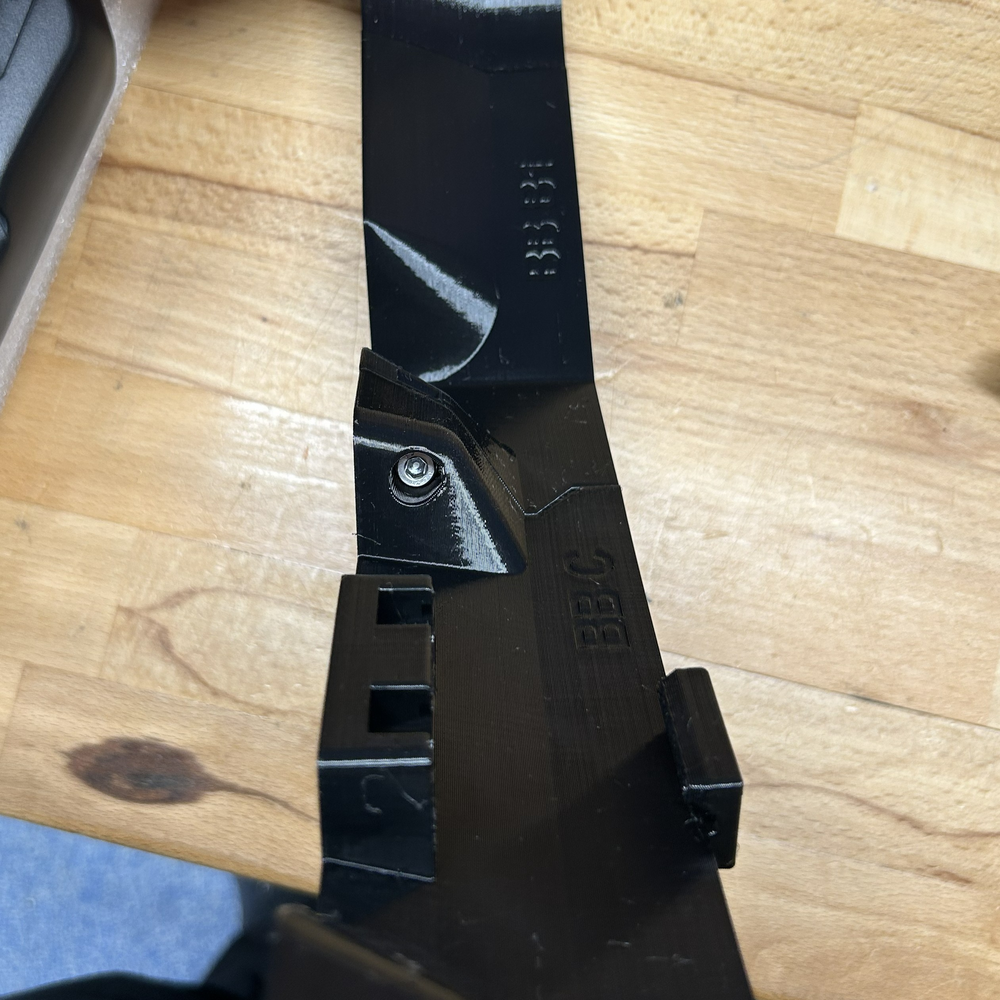
Step 2 - find the parts marked as BB B1/B2 and BB D1/D2. Insert the M5 nuts into the slots. Make sure that the hole in the nuts are aligned with the bumpers
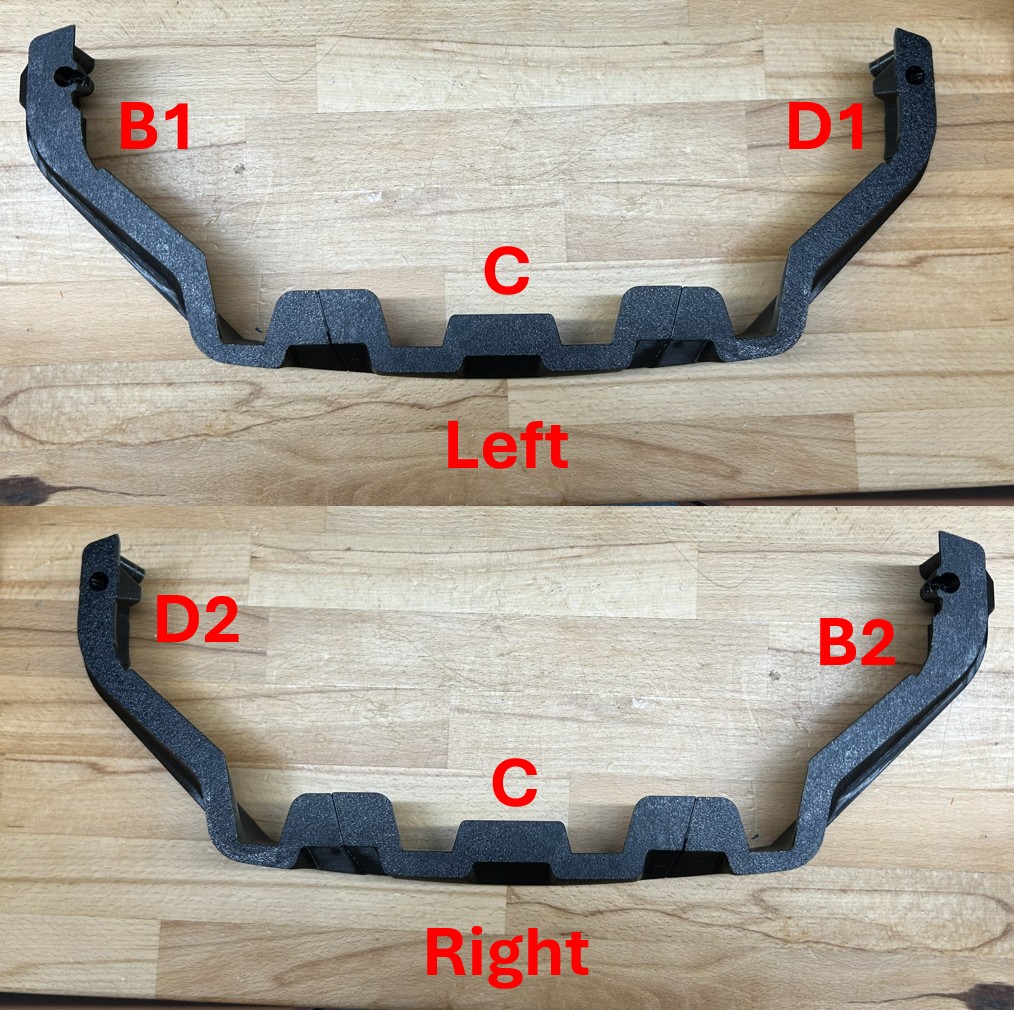
Step 3 - connect the parts B1,C,D1 (left) and B2,C,D2 (right) using M5x18 screws. Part B goes on the front and part D on the back of the EUC. Sections left and right should be their mirror reflections.
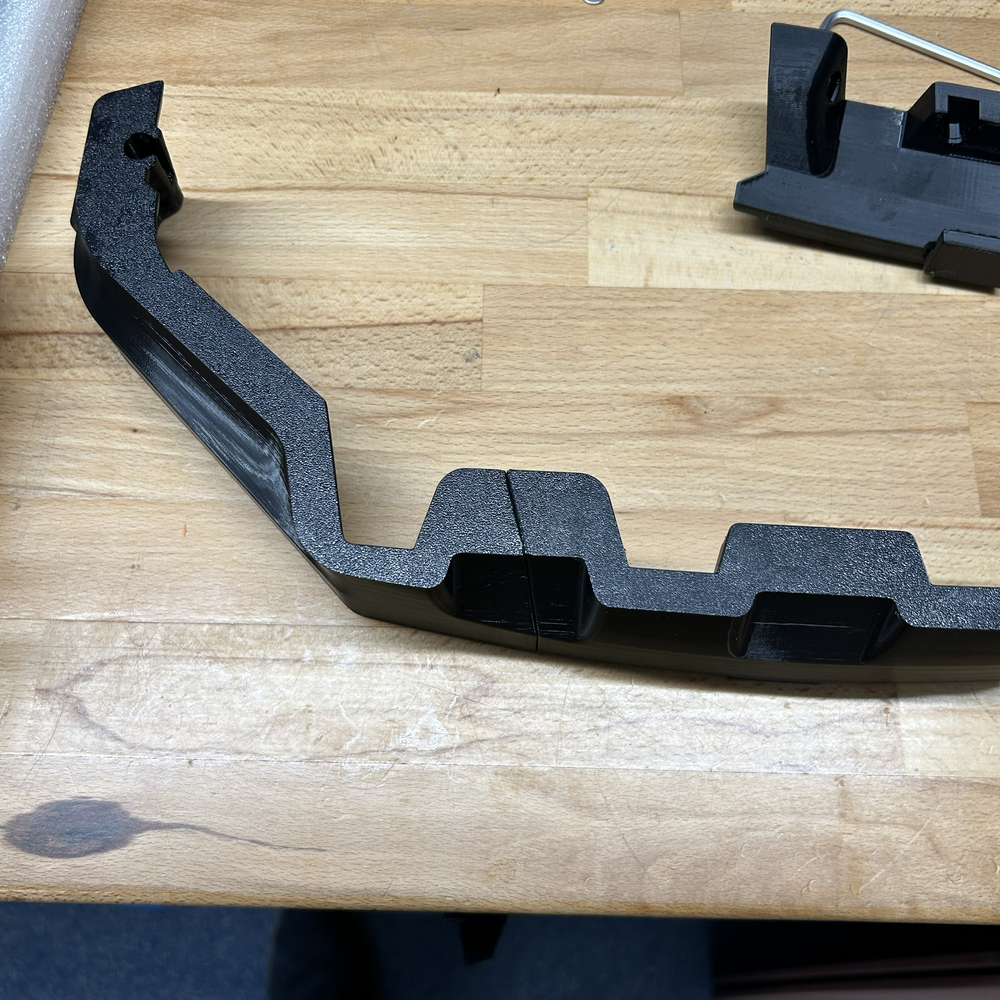
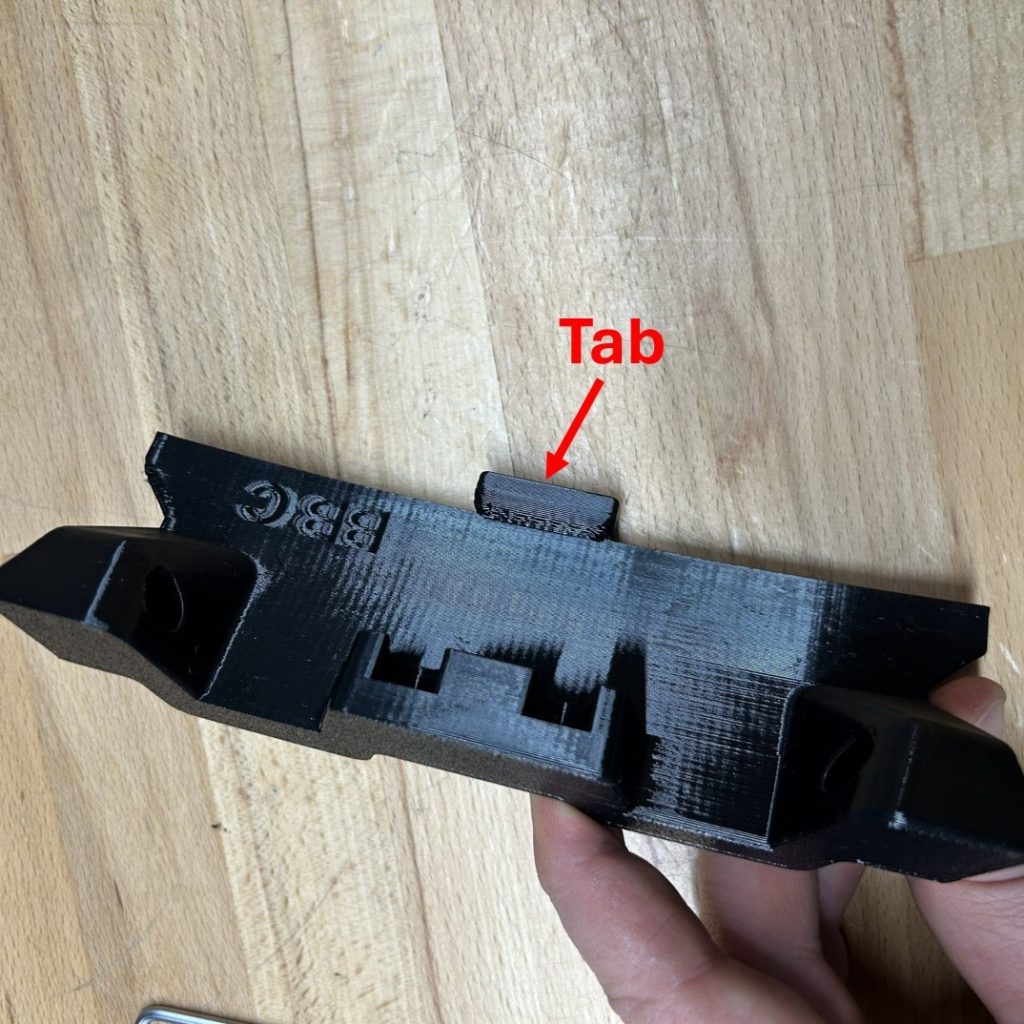
Step 4 - install the bottom protection on the EUC. Start from the center and make sure that the tab on the part C grabs the edge underneath the EUC body. Use the stock screw on the rear part and M5x18 with washer on the front